PCR : ElectrophoresisVisualize the results of your DNA amplification
The different stages of gel electrophoresis
Once the PCR amplification step is complete, it is necessary to perform electrophoresis to visualize your results. The amplification has produced DNA fragments of a defined size. These fragments will be placed on an agarose gel and will migrate according to their size and isoelectric point. The revelation will be carried out using a dye illuminated around 470 nm.


Preparation of an agarose gel
DNA fragments ranging from a few hundred to several thousand base pairs can be separated within a gel composed of a migration buffer and agarose.
The most commonly used migration buffer in laboratories is Tris Acetate EDTA (TAE), which, when charged with ions, allows the DNA to be "pulled" through the gel under the influence of the electric field from the negative pole to the positive pole.
TAE is typically supplied in 100 ml bottles and is concentrated at 10X. It should be diluted to 1X with distilled water for electrophoresis. Note that the same buffer should be used for both the gel and the migration buffer in the tank.
For example, to prepare 200 ml of 1X TAE buffer, mix 20 ml of 10X TAE with 180 ml of distilled water. You will need 15 ml to prepare the gel, and the remaining 185 ml can be used for the gel migration in the tank.
There are also other migration buffers, such as Tris Borate EDTA (TBE) or TGV buffer, for migrating DNA, RNA, or proteins, which rely on the same principle.
Agarose will serve to create a mesh within the gel. The higher the percentage of agarose in the gel, the tighter the mesh, and vice versa. The DNA fragments will then be slowed down according to their size.
| PhorEasy system | ||
|---|---|---|
| TAE 1X | Agarose | |
| 0.8 % | 15 ml | 0.12 g |
| 1 % | 15 ml | 0.15 g |
| 1.5 % | 15 ml | 0.23 g |
| 2 % | 15 ml | 0.3 g |
| 3 % | 15 ml | 0.45 g |
| DNA system and protein | ||
|---|---|---|
| TAE 1X | Agarose | |
| 0.8 % | 40 ml | 0.32 g |
| 1 % | 40 ml | 0.4 g |
| 1.5 % | 40 ml | 0.6 g |
| 2 % | 40 ml | 0.8 g |
| 3 % | 40 ml | 1.2 g |

To facilitate gel preparation, Jeulin has developed a casting tray (réf. 527024) suitable for the DNA and protein electrophoresis system (réf. 591059) and
une a casting system (réf. 708250) suitable for the phorEasy® electrophoresis system® (ref. 708150)
Pre-staining of the agarose gel
The development of safe DNA dyes, such as GelGreen™, that can be integrated directly into the gel during its preparation allows for immediate visualization using a transilluminator.
In addition to the convenience of immediate reading, the detection level is significantly higher than that of traditional dyes (such as Azure A), with fluorescence revealing very low quantities of DNA. No need for a staining bath anymore!
Add 1 µl of GelGreen™ 2 to 3 minutes after heating your buffer/agarose solution (approximately 1 µl for 15-20 ml of buffer). The still-liquid gel takes on an orange tint. Pour the gel and let it solidify. The gel is ready to receive the DNA fragments.


Loading amplified DNA fragments into the agarose gel
Loading the amplification products into the wells of the gel is a meticulous step.
The first well is typically used for the molecular weight marker. Depending on the electrophoresis system you are using, you can either load your samples directly into the tank or remove the support to the bench, perform the successive loading, and then return the support to its place. The loading buffer present in the reaction medium will help keep the sample at the bottom of the well.
Between 8 µl and 10 µl of DNA is required per well. The loading step is crucial. If any DNA remains in the tip of the micropipette or spills out of the well during loading, the results of the electrophoresis will be skewed (less colorful or absent bands).


The migration
Migration is performed using a power supply. This power supply can be external, connected to the tank, or internal for compact electrophoresis systems by phorEasy®.
Depending on the size of the tank, the voltage must be adjusted. The greater the distance between the two electrodes, the higher the voltage required.
The gel must be submerged under 3 to 5 mm of migration buffer. Be cautious not to add too much buffer, as this decreases the resistance between the two electrodes and can lead to a slowdown in migration, overheating, and distortion of the bands.
The migration time will depend on the electrophoresis system used, ranging from 15-20 minutes for compact systems to 45-75 minutes for traditional systems.
The revelation
If you have pre-stained your gel with GelGreen™ dye, you can directly proceed to the visualization step using a transilluminator, which will reveal the migrated DNA through fluorescence. If not, the DNA staining must be performed using successive baths with specific dyes such as methylene blue or azure A.
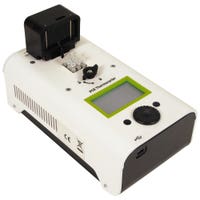
With the phorEasy® electrophoresis system, the transilluminator is directly integrated. Visualization can be done in real-time. For traditional systems, you will need to equip yourself with a transilluminator.
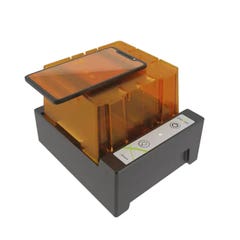
Visit our website to find the transilluminator and darkroom developed by Jeulin for optimal visualization of your results.


Visit our website to find the transilluminator (réf. 527044) and darkroom (réf. 527044) specifically developed by Jeulin for optimal visualization of your results..
Our selection of electrophoresis systems offered by Jeulin
Educational kits for teaching


You can find all our PCR and ready-to-use DNA kits on our website, designed and manufactured in our laboratory in Evreux, France.
These kits are developed based on themes from educational programs and created in collaboration with researchers from various French institutions.
No results obtained through indirect means! The materials provided in our kits allow you to conduct a genuine PCR experiment just like in a lab.
Tested & approved
Thermocycler taught for PCR
Guide to using a micropipette
Réalisation d’un génotypage par PCR


